Data replication with GlusterFS
High-availability projects depend on redundant services: a replicated database, data links from two providers, multiple VM hosts with live migration, and redundant power. Assume that anything can fail. Applications that read and write everything in a database are easier to keep consistent across machines; applications that are not designed for that need a replicated file system.
Consider a typical web application that stores relational data in a database but writes images, user uploads, and logs to disk. If the file system fails, the service stays offline until you restart the machine, check the disk, and—if you are lucky—recover the data. With a redundant service, another machine remains available with the data ready to use.
Software or hardware RAID can also protect against this kind of failure. However, multiple low-cost machines are easier to find than specialized, top-of-the-line hardware. Constant advances also make even expensive hardware obsolete quickly. It is often better to keep using a resource longer and replace it easily than to pay for a specialized service.
Several technologies provide data replication, including Ceph, Lustre, and HDFS, but I have not found one as simple and functional as GlusterFS. Red Hat has owned GlusterFS since 2011; it is the foundation of Red Hat Storage Server. This article describes tests I ran with GlusterFS and how to set it up on a few Debian 8 machines.
Test environment
I simulated the environment with four VMs created in VirtualBox. Each had 512 MB of RAM, one CPU, an 8 GB disk, and Debian 8. To isolate the network, each VM had a NAT interface and an internal network interface; VirtualBox created a gigabit network between the VMs. I assigned static IP addresses to the internal network:
VM gluster1:
192.168.20.1VM gluster2:
192.168.20.2VM client1:
192.168.20.10VM client2:
192.168.20.11
To avoid entering IP addresses directly or relying on a name-resolution service, update /etc/hosts on every machine by running:
bash
echo 192.168.20.1 gluster1 >>/etc/hosts
echo 192.168.20.1 gluster2 >>/etc/hosts
echo 192.168.20.10 client1 >>/etc/hosts
echo 192.168.20.11 client2 >>/etc/hosts
Installing GlusterFS on Debian 8
You can install GlusterFS from Debian's official repository, but I recommend using the latest version from the GlusterFS website. The instructions below assume you are root or add sudo to each command.
bash
wget -O - http://download.gluster.org/pub/gluster/glusterfs/3.7/3.7.9/pub.key | apt-key add -
echo deb http://download.gluster.org/pub/gluster/glusterfs/3.7/3.7.9/Debian/jessie/apt jessie main > /etc/apt/sources.list.d/gluster.list
apt-get update

# Nas máquinas gluster1 e gluster2
apt-get install glusterfs-server -y

# Nas máquinas client1 e client2
apt-get install glusterfs-client -y
For other versions—or if the links above stop working—find the appropriate URLs in the GlusterFS repository.
Configuring GlusterFS
Configuration is simple. First, establish trust between gluster1 and gluster2. On gluster1, run:
sh
gluster peer probe gluster2Then, on gluster2, run:
sh
gluster peer probe gluster1If an error occurs, check that the internal IP addresses work and that glusterfs-server is running (service glusterfs-server status). Restart the service if necessary. After establishing trust between two servers, you can add another server to the group only by probing it from a server already in the group.
Check the connection status with gluster peer status.

GlusterFS organizes data into volumes. Here, we create a volume stored in /glusterfs on each server. Create the directory on both servers with mkdir /glusterfs, then create the volume. Its name is an identifier used when mounting it on clients. Run this command on any Gluster server node in the cluster:
sh
# sudo gluster volume create <nomedovolume> replica <numerodereplicas> transport tcp maquina:/diretorio maquina2:/diretorio force

# Criando um volume chamado "file", com replica em dois servidores
gluster volume create file replica 2 transport tcp gluster1:/glusterfs gluster2:/glusterfs force

# Inicializando o volume
gluster volume start file
Check the volume with gluster volume status.

Now mount the volume on the client nodes. You can mount it manually or add it to fstab. I recommend updating /etc/fstab so the mount persists after a restart. On client1 and client2:
sh
# Criamos o diretório onde iremos montar o recurso
# Pode ser qualquer diretório
mkdir /glusterfs

# 1 Alternativa (temporária): Montando manualmente
mount -t glusterfs gluster1:/file /glusterfs

# 2 Alternativa (permanente): Montando pelo fstab
echo gluster1:/file /glusterfs glusterfs defaults,_netdev,backupvolfile-server=gluster2 0 0 >>/etc/fstab
mount -a # Para montar tudo que não foi montado ainda do fstab
The temporary mount specifies only one machine; the permanent mount also specifies a backup server (you can pass all these options to mount -o as well). This matters if gluster1 is offline when you restart a client: it can mount the volume from gluster2.
You can now use the directories.
Testing
On either client, open /glusterfs and create some files. The directory should update on all machines almost instantly.
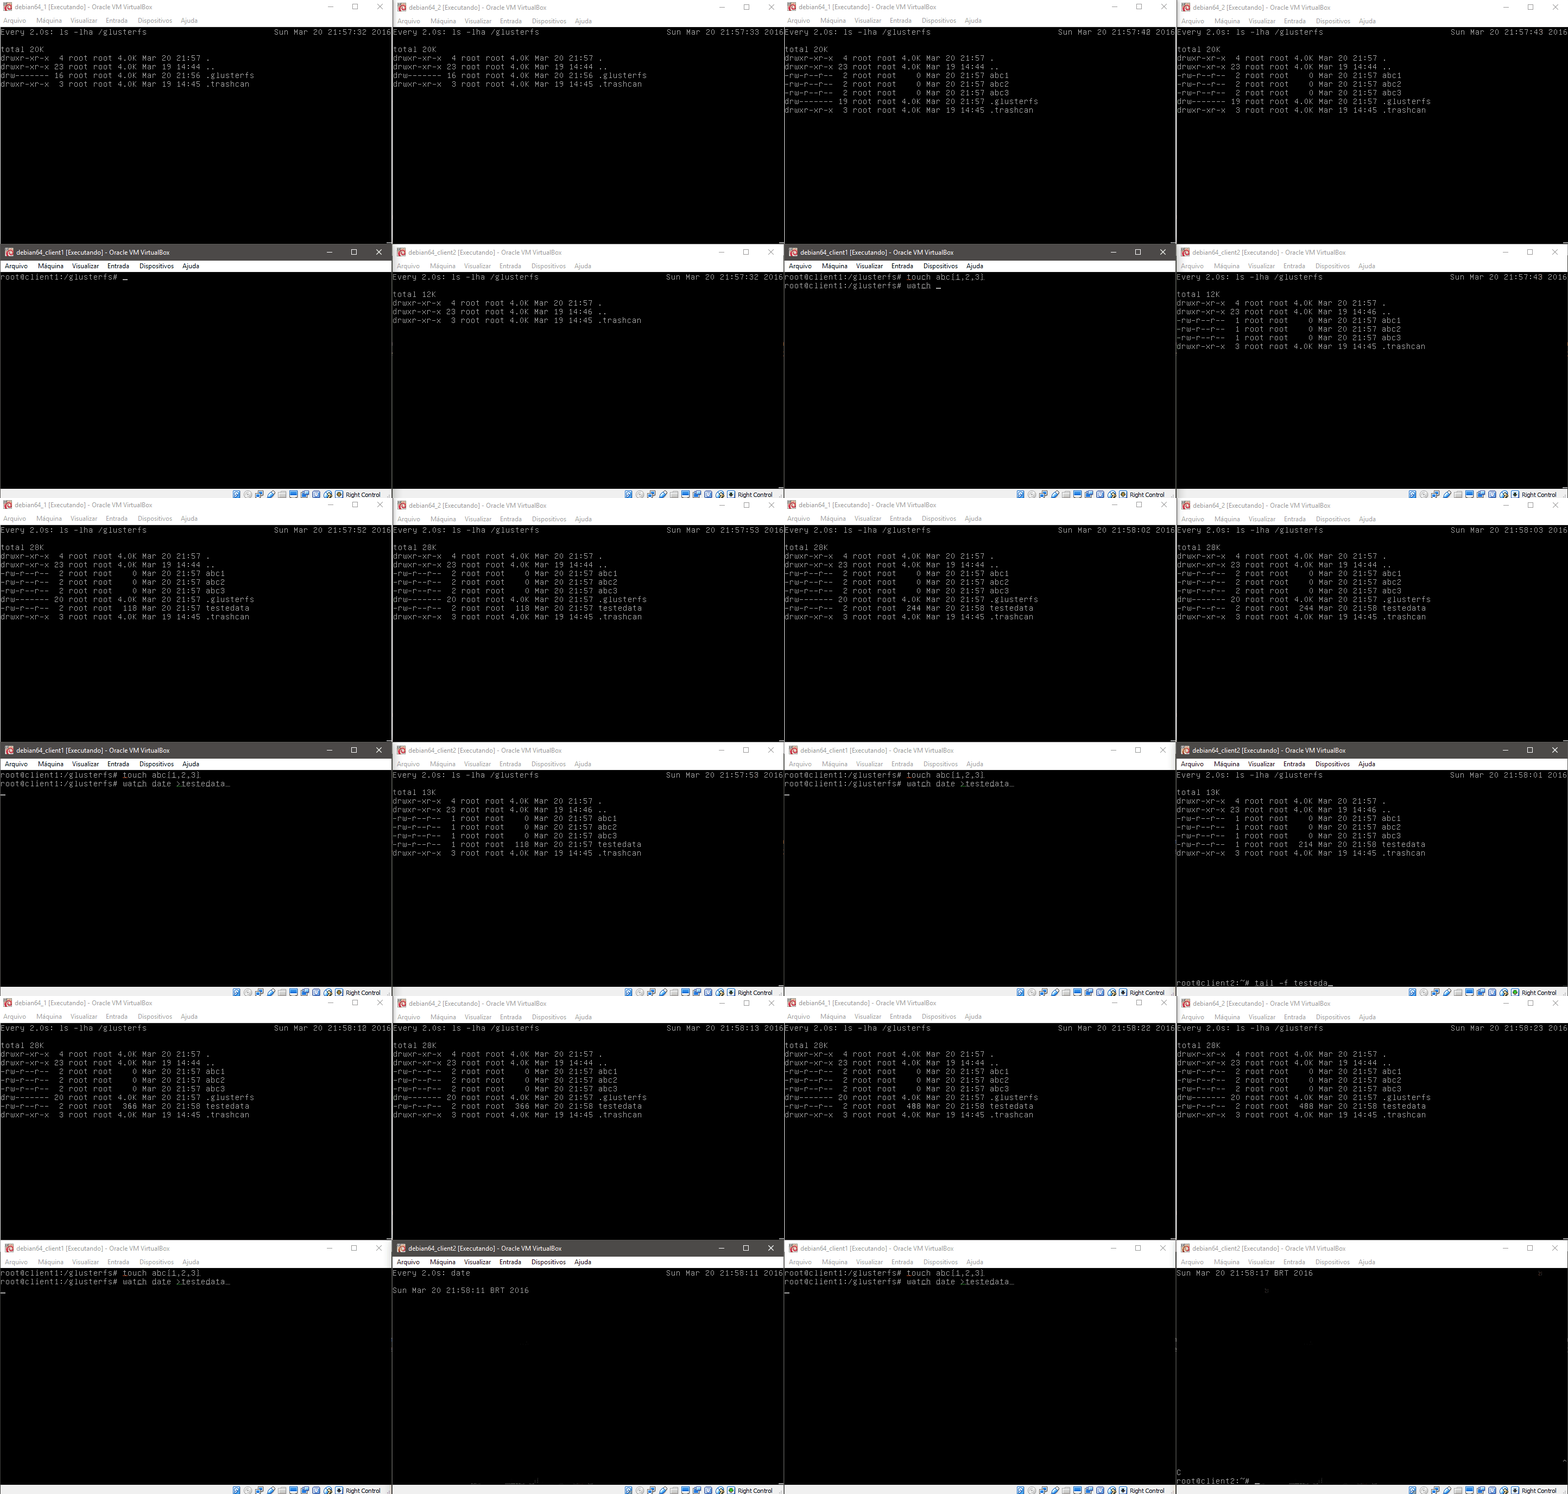
The image above shows gluster1 and gluster2 at the top and the two clients at the bottom. The next test checks how the system recovers from a failure or freeze.
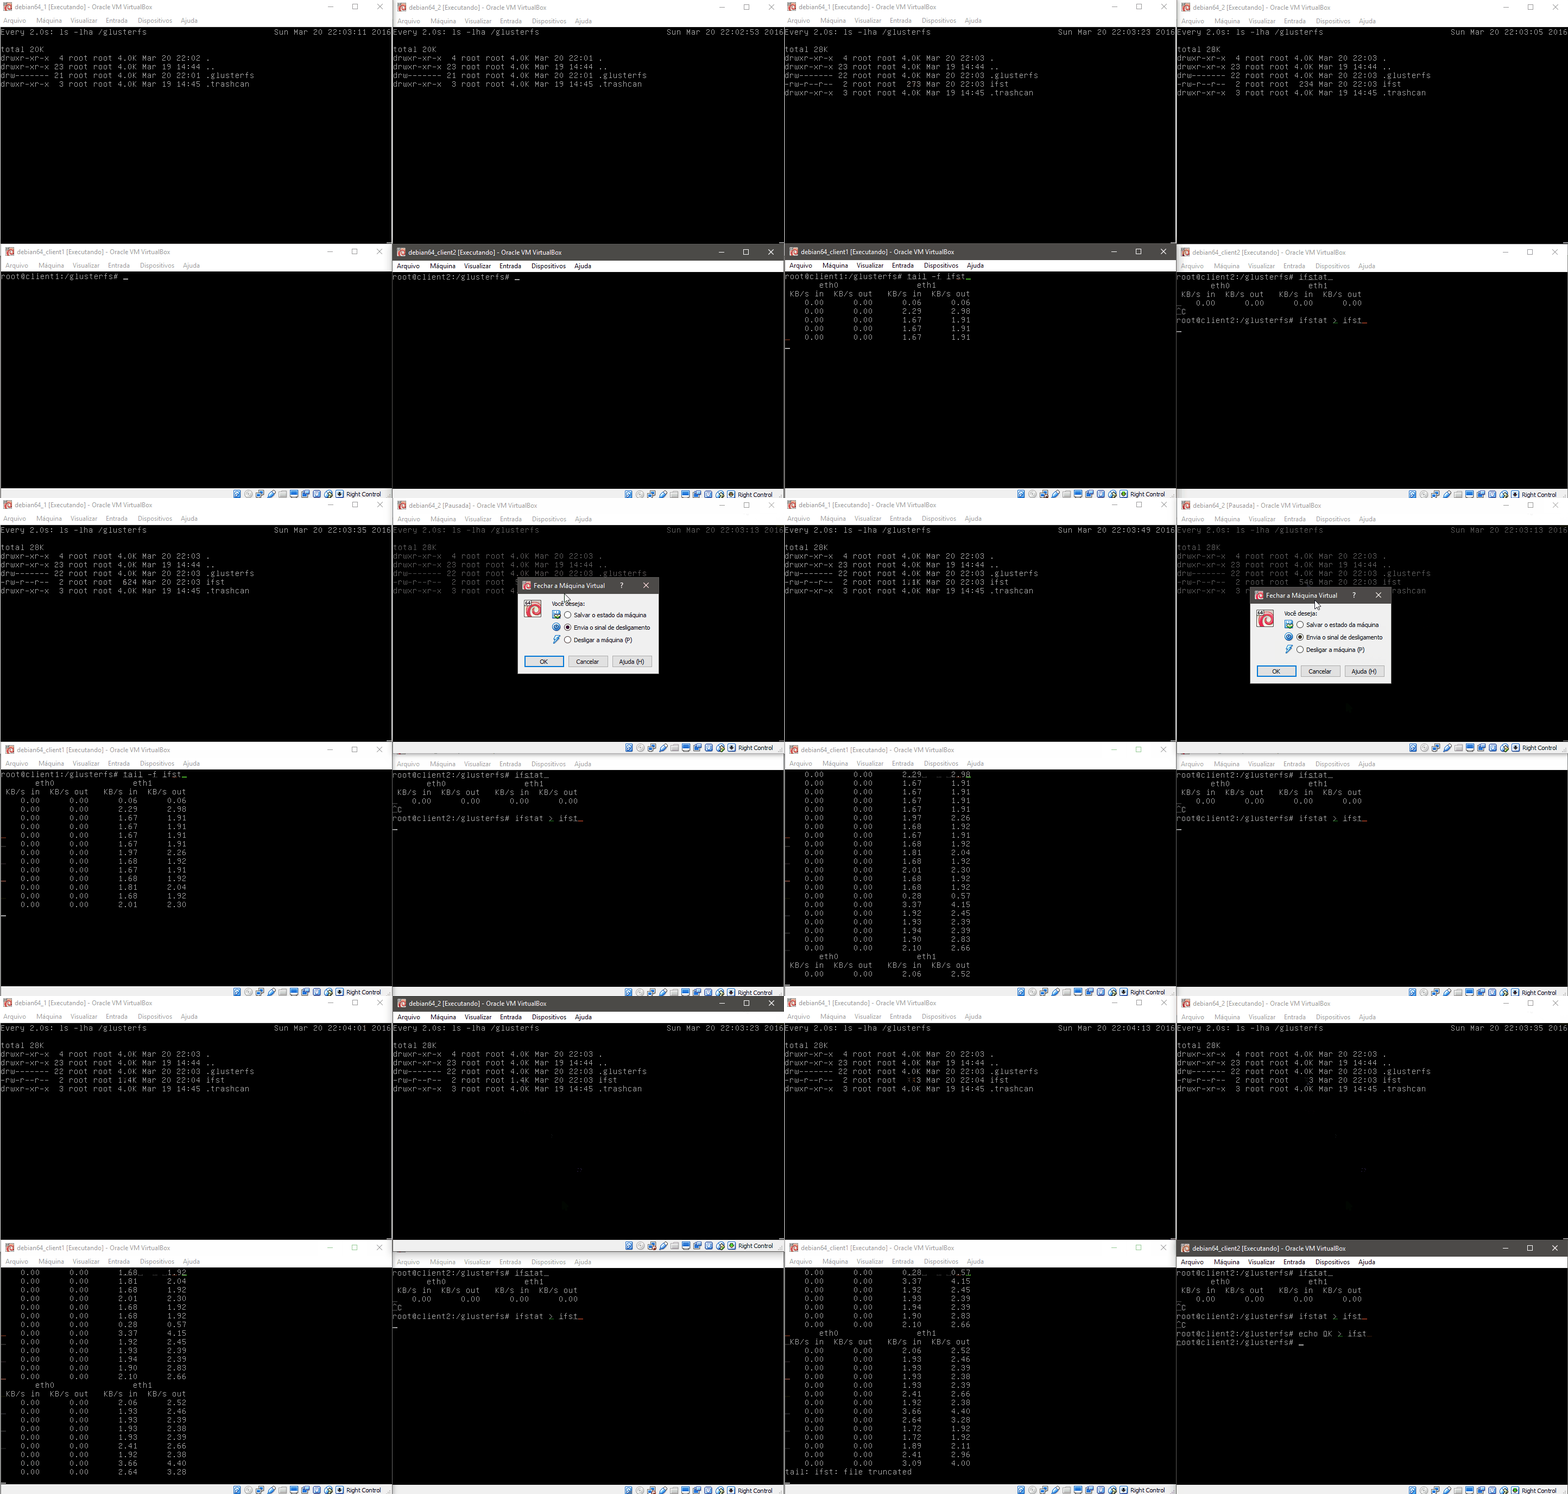
In this test, client2 continuously writes to a file while client1 reads it. When gluster2 is paused, updates stop on client1; after the gluster2 node times out, the cluster resumes feeding it. When gluster2 comes back online, it detects the outdated file and updates it before rejoining the cluster.
Test conclusions
GlusterFS is useful for systems that persist data to disk and is easy to configure. In my tests on a local gigabit network, I was even able to use it as the storage for VPS disks. Many configuration parameters let you tune details such as replication timeouts and buffers.
I did not test larger server groups to measure coordination overhead. With two machines, data synchronization easily reached about 80 Mbit/s. A large number of small files also takes longer to replicate between nodes: a script that created around 100,000 small files took nearly a minute to propagate them to each node.